
I am happy to bring you two different options for frying peppers (don't forget mine are KY bred!). One of the options was done with bell peppers due to a mismanagement of peppers. :P Oops! However- you can do BOTH with frying peppers.
The first option is your quick and easy, go-to recipe. Imagine this: fry..... your frying peppers. WHOA! Watch out! I know- you didn't expect it. However, it is delicious, and it's what they're great for. It takes very little time and management. Here we go!
You will need:
*About 15 small frying peppers (mine are Hungarian frying peppers from KY--> well traveled)
*1/3 of a cup of diced onion
*1-2 tablespoons olive oil
*1 teaspoon chili powder
*1 teaspoon garlic powder
Here are your marching orders:
1. Start your oil, seasonings, and onions heating on low heat in a pan.
2. Clean, seed and cut your peppers in half.
3. When the onions are beginning to be translucent, drop in your frying peppers.
4. Toss the peppers and onions a bit, and let them cook at medium heat.
5. Timing is kind of a personal touch with this. I'll explain, I like my frying peppers to have a bit of a crunch to them. If you are more into a softer cooked pepper you'll want to go longer. For my peppers, I cooked them for about 10-15 minutes. You can see in the pictures that follow, they still
have the majority of their color due to the quicker toss on the stove.


*The great thing about this is that you can individualize the spices. I was looking for a bit of kick with the peppers- hence the chili powder. You can also go basic with onion and garlic. Or go Hungarian (sorry- it's the majority of my blood- can't get away) and add in some paprika with it!
ARE YOU READY FOR RECIPE #2 ????? This second option is a bit more involved- but WAY worth it! A bit ago, the Hubby had been throwing out the words "stuffed peppers" every so often. It was a good hint to throw out.
Now, I will preface this recipe. (cough cough, to my family members reading this) My main heritage and culinary experience centers around Hungarian food. I was blessed to have the opportunity to learn to cook with my grandmother. For a summer, we spent afternoons cooking all of the Hungarian regulars that I grew up with. HOWEVER, this recipe is NOT the stuffed peppers I grew up with (nor my other family members - yes you guys). The recipe I grew up with and have made previously involves more of a sauce using tomato paste etc. Due to a lack of certain items in the pantry, I improvised. In the future- if you all are curious- I can post the true Hungarian version!
You Will Need:
*4 Bell peppers -you can use frying peppers if you'd like- you will need more than 4 as they are smaller
*1 lb. 93% lean ground turkey (this can be substituted with ground beef if you'd like)
*1/3 cup chopped onion
*1/4 cup ketchup
*2 teaspoons garlic powder
*1/3 cup oats (your binding agent)
*1 tablespoon (or so) olive oil
Marching Orders Are:
1. Preheat your oven to 375 degrees.
2. Wash and seed your peppers and cut off just the top - so they look like little bowls.
3. Combine your ground turkey, onion, ketchup, garlic powder, oats, and olive oil in a bowl.
4. Put your peppers in a baking dish that will be able to hold them all standing up right.
5. Fill the peppers with the well mixed meat and seasonings. You can fill them pretty tight as it will reduce a bit.
6. I added a bit of extra ketchup to the top of each pepper for extra flavor and moisture. About half way through the baking, my two peppers got some shredded mozzarella on top as well.
7. Bake your peppers for about 30-45 minutes. I say this because I originally was going for 30 minutes in the oven, but upon opening up one of them, I found that they needed a bit more time.
 \
\

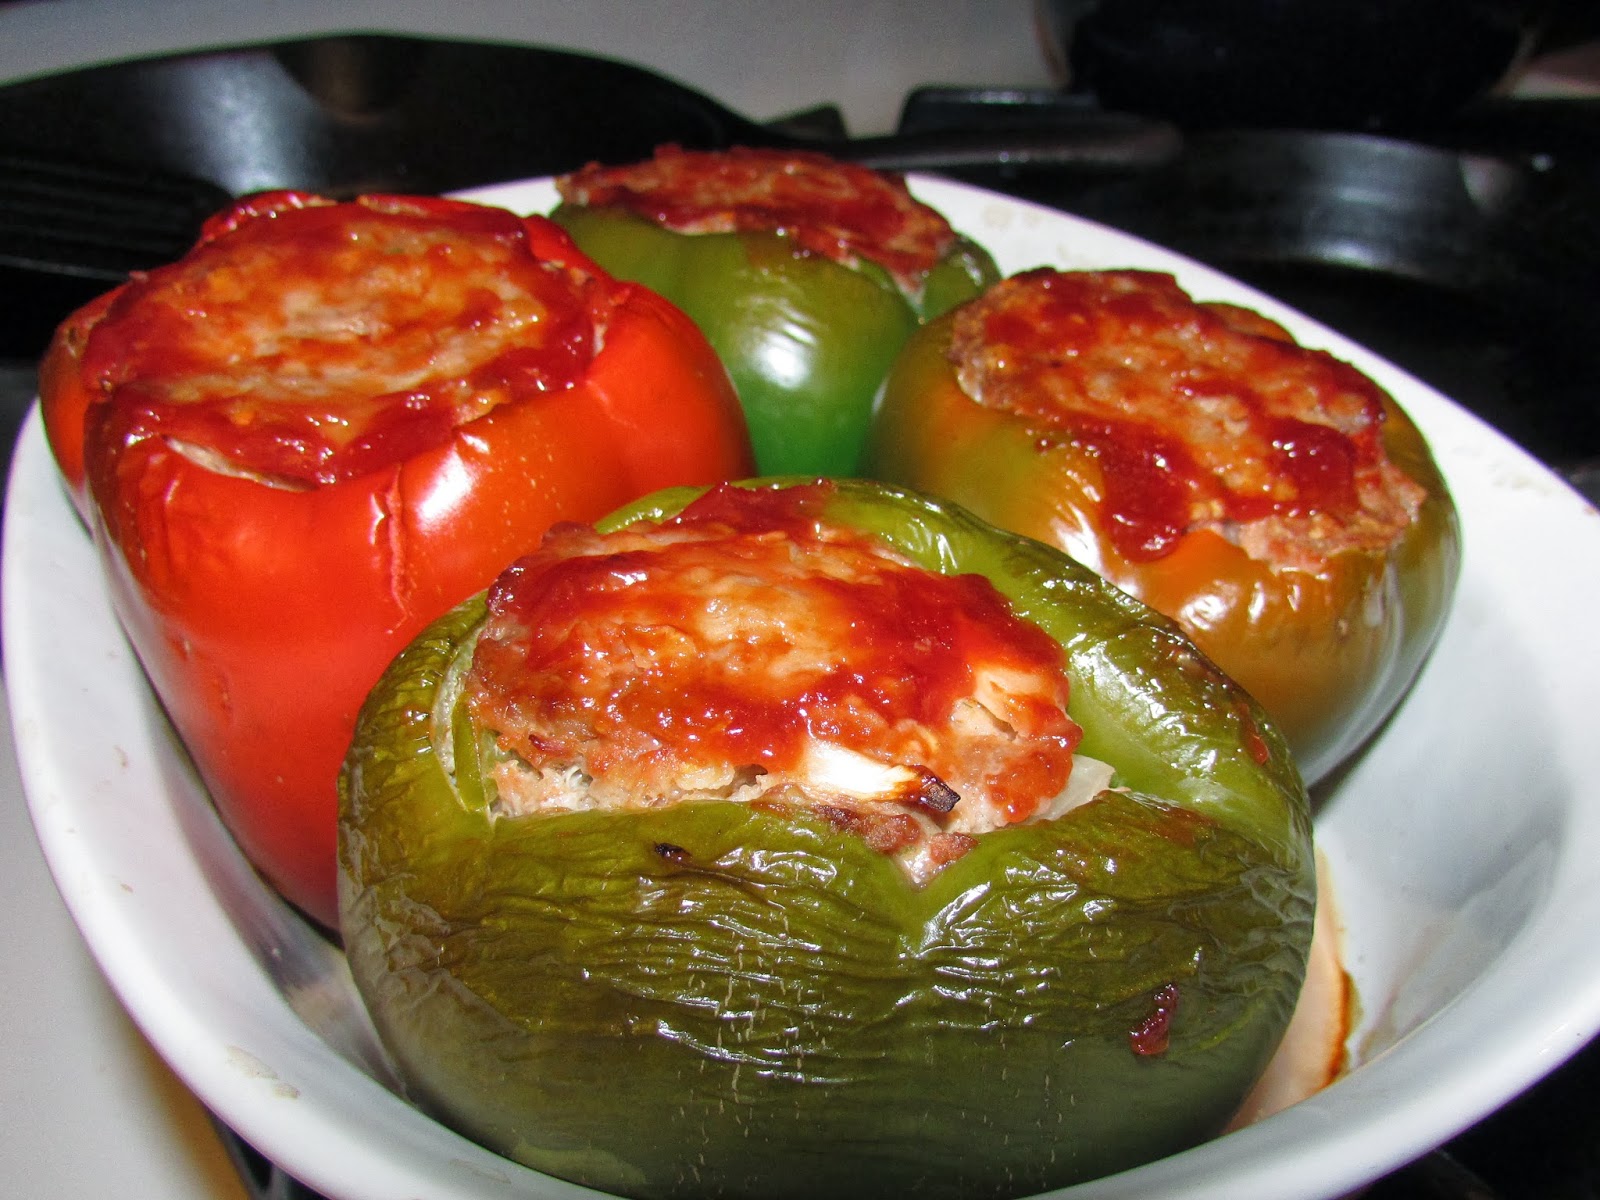 |
| Mid cook before cheese! |

*Enjoy! I personally like to keep the ketchup on the table in case of a need for more. Overall- these were a huge hit with the Hubby and one was filling enough for each of us! I'm sure that now that this post is up, I will be reminded of HOW LONG ago it was that I made them. :)
It is wonderful to be back on and typing to you. Whoever you are. Pleeeaase look forward to THANKSGIVING- A delicious pie is on deck with a fun new crust idea! And more importantly- be thankful. I know I am. I am thankful for the roof over my head, the husband who loves me, and the family and friends that support me. I am a blessed woman. Thank you to YOU for reading this and supporting me too! Again- I am just so blessed!
<3


